Setup WiFi Radius Auth with Unifi AP, Controller & pfsense
Assuming you do not have freeradius3 installed on pfsense in the past
Go to:
- System->Package Manager->Available Packages
- Enter freeradius3 on the Search term box, and Select freeradius3 from the list and click install on the right hand side

- Once successfully installed, go to Services->FreeRADIUS then click Interfaces followed by Add. Enter the details of your radius server host

- Interface IP Address: IP Address of your radius server
- Port:
- 1812 for Authentication
- 1813 for Accounting
- Repeat above for both ports (Accounting & Authentication
- Next, you’ll need to add a client to allow it to talk to your pfsense freeRADIUS server
- Click NAS / Clients (note, NAS = Network Access Server, not your commonly known NAS for storage)
- Then click Add to add a new client
- Fill in the required information

- Client IP Address: IP address of your Access Point (or other forms of client)
- Client IP Version: I use IPv4
- Client Shortname: Give it a meaningful name to allow you to identify the client
- Client Shared Secret: think of it as a password, you’ll need it to configure your client (AP in my case)
- I left the remaining parts unchanged
- Click Save
- I did some additional setting change
- Go to EAP
- I’ve updated the following fields:
- Disable Weak EAP Types: checked
- Default EAP Type: TTLS (you can choose other EAP sub-types too)
- Minimum TLS version: 1.2
- SSL CA Certificate: Select the CA of the certificate used
- SSL Server Certificate: Select the certificate that you want to use
- Next, add users that you want to allow access to your network
- Go to Users tab
- Click Add by providing the following (minimum)
- Username:
- Password:
- Password Encryption: MD5-Password (start with this)
- Click Save
- For your AP, go to your controller web portal, click Settings->Profiles->RADIUS (ignore the warning)
- Click Create New
- Fill in the form as follow

- Remember to click Add button for each of the Authentication Servers and RADIUS Accounting Servers after specifying them
- Click Apply Changes at the bottom of the page
- Next, go to you your wifi setting (Settings->WiFi) and click on your WiFi network name
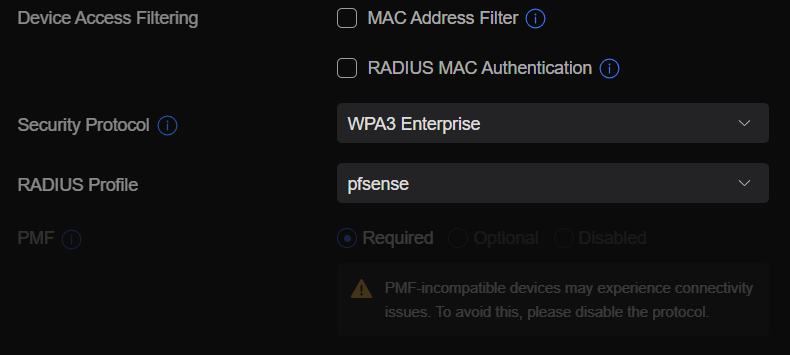
- Update the following fields as follow (assuming you name your RADIUS profile as pfsense)

- Click Save
- Update the following fields as follow (assuming you name your RADIUS profile as pfsense)
- Now your system is ready to authenticate your WiFi clients using radius auth
- From your WiFi client (e.g. Android), you will have to select the WiFi that you’ve configured to use your RADIUS server for auth, then enter your details as follow:

Note:
To help with troubleshooting, you can refer to logs in pfsense. However, I find the default logging which logs to System Log is not very friendly with search, therefore, I changed the setting for RADIUS to log to /var/log/radius.log instead under Settings tab of RADIUS config page.
Then I ssh to my RADIUS server and tail -f /var/log/radius.log to check out if the request comes through and if it’s successful.
References: